Search Results
423 items found for ""
- Homemade Chicken Stock
Making chicken stock or any stock for that matter, is NOT about a recipe whatsoever. It's all about the technique. You can make two completely different kinds of stock with almost the exact same ingredients and yet have them be totally different in flavor and appearance. INGREDIENTS: Brown Stock Ingredients: Chicken, beef, pork, or lamb bones (about 2-4# or 1-2 kg is a good start) 1 large carrot, rough chop 1 large onion (you can leave the skin on), rough chop 2 ribs celery, rough chop White Stock Ingredients: Chicken, beef, pork, or lamb bones (although usually chicken) 1 large peeled onion, rough chopped 5 cloves garlic rough chopped 2 ribs celery, rough chopped 1 bay leaf INSTRUCTIONS: *NOTES*: Don't season your chicken stock with salt or pepper. This is something that's overlooked quite often. Season whenever you use it in a recipe. The reason why is that if you season it nicely when it's freshly made, then it will likely end up too salty if it gets reduced for a sauce or added to a soup, etc. I also said 2-4 hours on the stock, then said 3-4 hours. It should be 2-4 hours... Just to clear up any potential confusion. Brown Stock Method: To remove the bones from your chicken, start by removing the legs. To do this, cut the layer of skin that connects the legs to the breast. Reveal the joint attaching them to the body and cut around that to fully separate the two. Repeat this process with the wings. For the breast itself, take your knife and cut along the breast bone, keeping it on the bone the entire time. Peel the meat from the bones. To remove the meat from the legs and wings, find where the bone is underneath the meat. Cut along the bone to reveal it and run your knife to slice it free. Place your chicken bones on a baking rack and drizzle with oil. Roast in the oven at 425 degrees Fahrenheit for 40-45 minutes. Once done, transfer to a large pot. To make the mirepoix; chop one carrot into large pieces, one peeled yellow onion and two stalks of celery. Place all of this into your pot with the chicken bones. Add enough water to cover an inch above your bones and heat on the stove over medium-high heat. As soon as it starts to boil, reduce to a low simmer. Make sure to remove any scum that floats to the surface with a ladle. Let this sit for 4-6 hours. Take a spider and remove the bones from the pot and place in a bowl off to the side. Strain your stock through a fine mesh sieve. White Stock Method: Place your chicken bones in a large pot and cover with cold water. Bring it up to a rapid boil and let it sit for 10 seconds. Strain through a mesh strainer and rinse your bones off with water. Place the bones back in the pot and cover with water again. Add in your mirepoix: celery, 5 cloves of garlic, 1 bay leaf. Bring it up to a boil and then reduce to a light simmer. Let it steep for 3-4 hours, skimming away any scum that forms at the top. Once done, strain your bones and mirepoix.
- Braided Bread
Braiding a challah whether it's three strand, four strand, or even six strand is truly the only part in the entire recipe that's slightly challenging. The rest of it is surprisingly easy. All the more reason to bake your own to have on hand for the best french toasts of all time, epic grilled cheeses, or whatever you like to use challah for. EQUIPMENT: Fermentation Station INGREDIENTS: 4 1/4 cup (515g) bread flour 2 whole eggs (100g) 4 egg yolks (67g) 1/3 cup plus 2 Tbsp (102g) water @90-95F or 32-35C 3.5 tbsp (78g) honey 1/4 cup (60g) vegetable oil like sunflower 1 Tbsp (16g) fine sea salt *you can reduce this amount if you don't like the loaf as salty* 2 tsp (6g) instant yeast Egg Wash Ingredients: 1 egg 1 Tbsp of water INSTRUCTIONS: Braiding A Four Strand Challah: Start by labeling your strands A,B,C, and D from left to right with the open part facing you. move A to the center, C to the far left, D to the center, B to the far right, C between A and D, and A to the far left, B in between C and D, D to the far right, you're back in your beginning position, just repeat what you just did until there isn't enough room to continue doing so, then bring the edges together and pinch together. Lightly fold 1/4 inch of the edges under the loaf to ensure they don't come undone. Method: Start off by mixing instant yeast with water warmed to 95 degrees Fahrenheit. Give a little mix until dissolved, and let it sit for 5-8 minutes. In a small mixing bowl, mix together bread flour and fine sea salt. Transfer to a stand mixer fitted with a dough hook; and with your mixer on low speed, add in your yeast mixture along with honey. Toss in the remainder of your ingredients - 2 whole eggs, 4 egg yolks and vegetable oil. Mix on medium-low speed, scraping the sides if necessary for 4-6 minutes. Lightly grease a medium sized bowl and shape your dough into a ball by gently tucking the bottom into itself and rolling it onto a work surface. Place your taut ball in your bowl and cover with plastic wrap or a damp towel. Let sit at about 76 degrees Fahrenheit for one hour. Once that hour is up, perform some light stretch and folds by grabbing one edge and folding it over to the middle; repeating all the way around the dough. Then, pick up your dough and flip it over seam side down. Cover and let it rest again for one more hour. After that hour has passed, remove your dough from the bowl and divide it into 4 pieces; each weighing about 232 grams. Take each piece and shape it into a rough rectangle that’s relatively even. Fold the top part of the rectangle to the middle and repeat with the bottom; overlapping the top. Gently seal it and lightly conform to an even tube shape. Repeat with all of your remaining dough, cover and allow to rest for 15 minutes. Once they’ve rested, dust a work surface with flour and gently roll out your dough into 13-14 inch strands; starting from the middle and working your way out to taper off the edges. Take your 4 strands and meet them all at one point from the end facing farthest away from you. Conjoin all of those strands together. *See above for a guide on braiding your loaves.* When you’re done braiding, pinch all of the edges together and push that edge underneath the loaf. On a baking sheet, spray on some cooking oil and then place down parchment paper. Place your braided loaf on the baking sheet and brush with egg wash. Once done, place in an oven that’s turned off with the light on. Let it rise for 2 hours. During this time, brush the loaf every 40 minutes with egg wash. To test and see if the loaf is done proofing; dip your finger in egg wash and poke the loaf. If it springs back easily, it’s ready to bake; if not, it needs to proof more. Set your oven to 375 degrees Fahrenheit and brush your loaf one last time with egg wash. Place your loaf in the oven and immediately reduce the temperature to 325 and bake for 45-50 minutes or until golden brown.
- Homemade Churros
Sometimes you get a craving that is only satisfiable by churros. Unfortunately not all of us have an easy to find churro vender unless you're really lucky. The time making churros at home has arrived, and it's actually really easy! EQUIPMENT: Star Tip for Piping Bag INGREDIENTS: Churro Dough Ingredients: 6 tbsp (84g) unsalted butter 1 cup (235g) water 1.5 Tbsp (20g) granulated sugar 2 tsp (9g) vanilla extract 1 tsp (6g) fine sea salt 1 cup (140g) all purpose flour 3 eggs plus on egg yolk Sugar Coating Ingredients: 1/2 cup (130g) granulated sugar 1 tsp (2g) ground cinnamon Optional Mexican Chocolate Sauce Ingredients: 1/2 cup (123g) heavy cream 1 Tbsp (3g) espresso powder *you can use half this if it's too strong* 1/4 tsp (.5g) cayenne 1/4 tsp (.5g) ground cinnamon 1/2 tsp (2g) vanilla extract 5 ounces (140g) dark chocolate (60% cacao is best) Small pinch salt INSTRUCTIONS: Method: Melt your unsalted butter gently over medium heat in a pot. Once melted, add 1 cup of water, 1 teaspoon of salt, 1 ½ tablespoons of granulated sugar and 2 teaspoons of vanilla extract. Bring to a boil. Once it reaches a boil, bring to medium-low heat add in 1 cup of all-purpose flour. Mix together until it forms a cohesive dough, then remove from heat and add 3 eggs and one egg yolk. Transfer mixture to a piping bag fitted with a large star tip. Fill a large, heavy bottom pot halfway with oil and set in a candy/deep fryer thermometer. Heat up to 375 degrees Fahrenheit. While that’s heating up, whisk together granulated sugar and cinnamon. Transfer mixture to a small baking dish. Then set a wire rack on a baking sheet and cover it with a paper towel. Pipe your batter directly in the oil until it’s about 4-5 inches long. Snip it off with scissors. Fry for 5-8 minutes, or until golden brown. Remove from oil using a spider and place on your paper towel landing. Allow to drain for 30 seconds and then toss in your sugar mix. Repeat with remaining batter. For your chocolate sauce, bring your heavy cream to a boil. Add in vanilla extract, cayenne pepper, ground cinnamon and espresso powder. Mix in your dark chocolate until thoroughly incorporated and fully melted.
- Homemade Gravlox
Gravlox also known as gravlax, is one of my most favorite foods of all time. Often confused with smoked salmon, which is typically hot smoked rather than cured and served raw or cold smoked like lox. INGREDIENTS: Center cut Salmon fillet skin on (ideally 1.5 pounds or 682g) 15% salt 15% sugar Fresh dill other aromatics 3% gin or other liquor (optional) 1% pink curing salt for cold smoking (optional) INSTRUCTIONS: Method: Take the weight in grams of your salmon with it’s skin on and multiply it by 0.15. This will be the gram weight for both your sugar and salt. Whisk salt and sugar together. Take long sheets of plastic wrap and lay them one over the other to form a cross. Sprinkle half your cure in the center of the cross and spread it to be the size of your salmon piece. Lay your salmon skin side down onto the cure mixture. *optional to drizzle the surface of your salmon with liquor.* Sprinkle the remaining cure over the entire surface of the salmon, making sure to coat it edge to edge. Add enough fresh dill to coat the surface; then wrap it up tightly, making sure it’s completely encased with no leakage. Place in a rimmed dish, place another flat bottomed dish on top and weigh it down with heavy objects. Place in the fridge and allow to cure for 1-3 days.
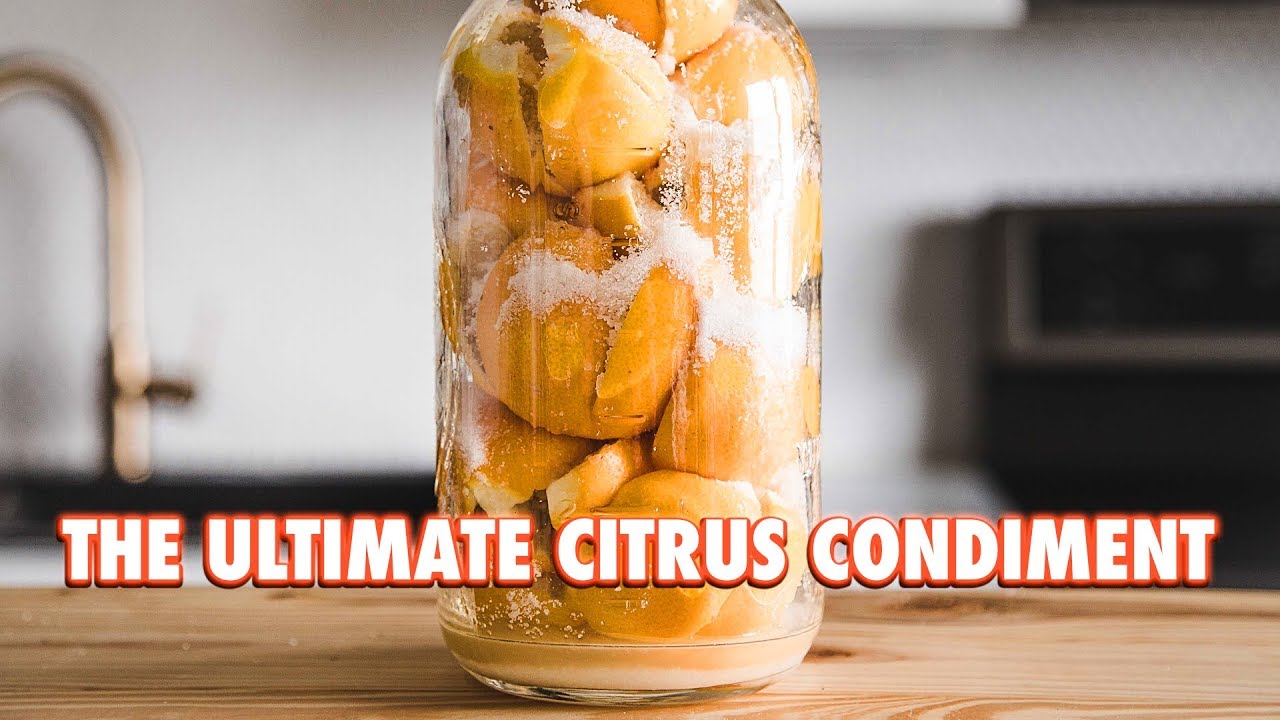
- Preserved Lemons
They're cured, lacto fermented, preserved lemons. Whatever you want to call them; they're full of intense citrusy flavor with a soft bite. Definitely one of my very favorite condiments of all time. INGREDIENTS: 10-12 meyer lemons (or normal lemons) *organic is ideal* Kosher Salt MAYBE Lemon Juice if you need more liquid to cover INSTRUCTIONS: Method: Cut off a tiny bit from both ends of your lemons. Take a lemon and cut in half lengthwise, stopping ¾ of the way through. Rotate the lemon 90 degrees and repeat the same process. Place a lemon in a bowl, open it up and coat generously with salt. Continue this process with all of your lemons and place them all in a glass jar. Once all of your lemons have been added to the jar, sprinkle with salt and mash to release their juices. Continue until all of the lemons have been compacted and are covered with the lemon juice. Place a loose lid on the jar to cover and leave out in room temperature to ferment for 3-4 weeks. Continue to check on your lemons to make sure they’re fully submerged in the brine, pressing if needed.
- Panettone
The secret to homemade Panettone that is naturally leavened with a sourdough starter has arrived. I wanted to show you guys how to make a traditional (ish) panettone that's way better than what you can buy at the store. And when I say traditional, I really mean traditional (with a couple twists). EQUIPMENT: Fermentation Station Panettone Molds Diastatic Malt Powder INGREDIENTS: Stiff Levain 4hr Feedings Ingredients: 24g Mature starter 24g all purpose flour 12g water @ 85 degrees Fahrenheit Stiff Levain Overnight Feeding Ingredients: 12g mature starter 24g all purpose flour 12g water @ 85 degrees Fahrenheit First Dough Ingredients: 350g Bread flour 200ml or 203g water @ 85 degrees F 57g stiff levain 83g granulated sugar 3 large egg yolks (53g) 1 tsp (6g) diastatic malt powder 83g unsalted butter, softened ⅛ tsp (.5g) instant yeast (optional but the process will be a little slower and have a touch less bloom) Candied Citrus Ingredients: 3 large navel oranges or 4 large lemons worth of peel 2 cups (473g) water 2 cups (450g) sugar Final Dough Ingredients: 168g bread flour 2 egg yolks (36g) 6g fine sea salt 1 vanilla bean pod of seeds Zest of half an orange 55g water @85 Fahrenheit 82g granulated sugar 130g unsalted butter, softened 16g honey 78g raisins 63g pistachios 120g candied orange peel 55g candied lemon peel Glaze Ingredients: 80g granulated sugar 5g sunflower oil 4g corn flour 4g cocoa powder 6g almond flour 30g egg whites Swedish pearl sugar for sprinkling on top after glazing INSTRUCTIONS: Method: Start with 24 grams of mature 100% hydration sourdough starter in a glass/plastic jar. To that, add in 24 grams of all-purpose flour, water warmed to 85 degrees Fahrenheit. Stir until thoroughly combined. Put the lid on and place it in a warm, ambient environment around 85 degrees Fahrenheit. To feed your starter, add the same exact amount that you fed in the beginning. Feed it every 4 hours for at least 2-3 feedings. If you need to let your starter sit for 12 hours to overnight; reduce your mature starter from 24 grams to 12 grams and leave out at room temperature. Take 50ml of water and warm to 90 degrees Fahrenheit. Dissolve an ⅛ of a teaspoon of instant yeast. In the bowl of a stand mixer; add in your bread flour, diastatic malt powder and granulated sugar. Whisk together until thoroughly incorporated. Turn on your mixer to low-speed and then add in your bloomed yeast mixture, 3 egg yolks and the sweet levan you made earlier. Be sure to scrape down the sides of the bowl occasionally to make sure there are no dry bits of clumped flour. Once your dough has come together; with your mixer on low speed, add in unsalted butter 1 tablespoon at a time until all is used. Then, just mix together completely. Cover your dough with plastic wrap and let it rise for 12 hours at room temperature. For the final dough, make your candied lemon and orange peels. Start by cutting on the ends of an orange with your knife, and cut along the perimeter to obtain the peel. Repeat this process with 3 large navel oranges. Cut all of your peels into ¼-inch strips Repeat this process with 4 large lemons. Place your orange peels in a pot with enough water to just cover them. Bring it up to a boil, and as soon as it boils remove it from the heat. Strain through a mesh strainer and lightly rinse them off with cold water. Repeat this process once more. After the second time, add 2 cups of granulated sugar and 2 cups of filtered water to a pot and bring up to a boil. Reduce to a simmer and let sit for 25-30 minutes or until they’re tender and the liquid is slightly reduced. Repeat steps 11-12 for the lemon peels. Once it’s been 12 hours and the dough has tripled in size, transfer it to the bowl of a stand mixer. Add in your bread flour, zest from ½ an orange, one vanilla bean pod, fine sea salt and 2 large egg yolks. With your mixer on low speed, slowly pour in 55 grams of water heated to 85 degrees Fahrenheit. Make sure to reserve 10 grams to be used later. Continue mixing at medium-low speed for 1-2 minutes. Then with your mixer at medium speed, add in 82 grams of granulated sugar in batches. Now, with your mixer at low speed, add in 130 grams of unsalted softened butter a little bit at a time. Mix dough at medium-low speed for 5 minutes, or until the dough starts to pull away from the sides of the bowl. Next, with your mixer at low speed, add in raisins, candied orange and lemon peels which have been roughly chopped, and crushed pistachios. Allow to mix evenly. Pour dough out onto an un-floured work surface. Pick up the dough, place the bottom piece and smack it back down on the board, folding it over itself. Continue this process until it starts to hold itself together and doesn’t feel as sticky. Once the dough has a smooth surface; place it in a bowl, cover with a damp towel and let it rest for one hour. Half way through at the 30 minute mark, perform one set of stretching and folding. Grab one end of the dough, stretch it and fold it over itself. Repeat all the way around. Cover and let it rest for the remaining time. Scrape your dough out onto an un-floured work surface. Be sure to weigh your dough according to the size of mold you have. 500g of dough for a 5-inch mold. 700g of dough for a 6-inch mold. 850g of dough for a 7-inch mold. Spraying your bench scraper intermittently, use it to push the dough up under itself and rotate it. Continue this until you get a nice taut ball. Transfer your dough into your panettone molds and let proof in an 85 degrees Fahrenheit environment, for 4-6 hours. Create your glaze by combining almond flour, corn flour, cocoa powder, sunflower oil, sugar and egg whites in a bowl. Mix together and place in a piping bag. Preheat your oven to 350 degrees Fahrenheit and pipe your glaze over your dough. Place them in the oven and let them back for 35-50 minutes or until their internal temperature is 185 degrees Fahrenheit. Once they’re done baking, take 12-inch skewers and skewer the bottoms of your loaves at two points. Make sure to skewer them evenly so they don’t hang at an angle. Hang your loaves upside down and let cool for 12 hours.
- Fermented Ginger Beer
This drink is an almost miraculous moment, where you literally just take some sugar, and some ginger, mix it in water, let it sit, and then in a few days, you have a powerful fermented mixture to make your very own ginger beer without adding any commercial yeast at all. You are basically harnessing the power of nature to make a Moscow Mule. ITEMS USED: Flip Top Bottles Pyrex Measuring Cup OXO Good Grips® Small White Silicone Spatula INGREDIENTS: ‘Ginger Bug’ Ingredients (First Day): 2 cups (500ml) filtered water 2 Tbsp (22g) finely chopped or grated ginger (skin on is fine) 2 Tbsp (28g) granulated sugar Ginger bug feeding (every 24 hours): 2 Tbsp (22g) finely chopped or grated ginger (skin on is fine) 2 Tbsp (28g) granulated sugar Ginger Beer: 2 quarts filtered water 1 1/4 cup plus 2 Tbsp (273g) granulated sugar *see notes* 1/4 cup (54g) ginger, grated 1/2 cup (110g) strained ginger bug liquid *optional* Juice of 3 lemons *notes on sugar in ginger beer: You're welcome to make the ginger beer much less sweet if you prefer. I would say the lowest you can go on sugar is 1/2 cup (170g). INSTRUCTIONS: Method: To cultivate your own wild yeast, combine filtered water with granulated sugar, finely chopped ginger and place in a 1-quart glass/plastic container. Mix together until the sugar is dissolved, and cover with a cheesecloth. Let it sit for 24 hours. Moving forward, add the same amount of ginger and sugar every 24 hours until it becomes fizzy. This should take about 2-3 days. Once the ginger bug is fizzy, pour 2 quarts of water into a large pot. To that, in granulated sugar and grated ginger. Bring up to a boil and then reduce the heat to a simmer and let it sit for 5-8 minutes. Let it cool down naturally until it reaches room temperature, leaving all of the ingredients in there to steep. Once it’s up to room temperature, strain your liquid through a fine mesh colander. Make sure to press out the juices. Next, add in ½ cup of your strained ginger bug and the juice of 3 lemons. Mix together until thoroughly combined and transfer that mixture to some flip-top bottles. Make sure to leave 2 inches of head room. Let them sit out at room temperature with the flip bottle tops locked, for 3-6 days or until they’re fizzy. Once they’ve reached that point, you can refrigerate them; but make sure you’re opening the top and burping them once a day.
- Holiday Cookies
Cookies are meant for everyone. With the wild plethora of cookie recipes out there, here's my top 5 favorite. Best part, they are all insanely easy. INGREDIENTS: Sugar Cookie Ingredients: 2 1/2 cups all purpose flour (312g) 1 ¼ cup granulated sugar (285) 1 cup butter softened (227g) 1 ¼ tsp baking powder (7g) 1 tsp fine sea salt (6g) 1 egg 2 tsp vanilla extract (6g) *More sugar for coating* Tahini Chocolate Rugelach Ingredients: 1 cup (227g) Unsalted butter, softened 8 oz (225g) cream cheese, softened 3 Tbsp (42g) firmly packed brown sugar 2 large egg yolks (37g) 1 tsp (4g) vanilla extract 2 cups (250g) all purpose flour 1/2 tsp (2g) kosher salt 1 cup (267g) tahini, 6 oz (175g) dark chocolate, finely chopped 1 large egg, lightly beaten for brushing Salted Butter Hazelnut Russian Tea Cakes Ingredients: 1 cup (227g) salted butter softened, 2 tsp (6g) vanilla ¾ cup (80g) powdered sugar 2 cups (250g) all purpose flour ½ cup (60g) finely chopped hazelnuts ¼ cup (25g) chopped pecans 1/4 tsp (1g) fine sea salt *More powdered sugar for coating* Chewy Molasses Ginger Snaps Ingredients: 1 Tbsp (7g) ginger powder 1 Tbsp (7g) cinnamon 1/4 tsp (1g) ground nutmeg ¼ tsp (1g) cloves ½ tsp(2g) fine sea salt 2 cups (250g) flour ½ cup plus 2 Tbsp (113g)butter, melted 1 egg 1 egg yolk ½ cup (110g) brown sugar ¼ cup (90g) black strap molasses INSTRUCTIONS: Sugar Cookie Method: Start by placing softened butter into the bowl of a stand mixer fitted with the paddle attachment. To that, add in granulated sugar, gradually working your mixer up to medium-high speed. Beat the butter and sugar together until it reaches a creamy consistency. Lower your mixer speed to medium and add in vanilla extract and 1 whole egg. Beat together until thoroughly combined. Then, with your mixer on low speed, slowly add in your all-purpose flour, sea salt and baking powder. Once the dough has come together, roll into 2-inch diameter balls and place on a baking sheet lined with parchment paper. Be sure to space them far enough apart. Bake cookies at 350 degrees Fahrenheit for 10-12 minutes. Tahini Chocolate Rugelach Method: In the bowl of a stand mixer fitted with the paddle attachment, add in unsalted butter and cream cheese. Beat until creamy. Make sure to stop intermittently to scrape down the sides of the bowl as necessary. Add in 2 egg yolks one at a time, beating well after each addition. Next, beat in vanilla extract. With the mixer on low speed, gradually add in all-purpose flour and kosher salt. Mix until you have a cohesive dough. Divide dough in half and shape each half into a rough disk. Wrap in plastic wrap and refrigerate for 3-6 hours. Take half of your dough into an oval, ¼ of an inch thick. Using a bench scraper, cut the edges to form a roughly clean rectangle. Spread ½ cup of tahini all over the entire surface, leaving a border around the edges. Sprinkle on dark chocolate and roll the dough up into a tight log. Then, using a sharp knife, cut the log into 1 ½ inch slices. Place disks onto a baking sheet lined with parchment paper and brush each one with an egg wash. Bake in the oven set to 350 degrees Fahrenheit for 20-30 minutes. Salted Butter Hazelnut Russian Tea Cakes Method: In a bowl, mix together your softened salted butter with your powdered sugar until thoroughly combined. Add in vanilla extract and mix together. Add in your remaining ingredients: all-purpose flour, finely chopped hazelnuts, finely chopped pecans, and fine sea salt. Mix together until thoroughly combined and you have a cohesive dough. Roll your dough into 1-inch diameter balls and place on a baking sheet lined with parchment paper. Bake at 350 degrees Fahrenheit for 12-15 minutes or until the cookies have set. You do not want to brown these too much. Remove from the oven and let cool on a wire rack for 10 minutes. Roll in powdered sugar while they’re still warm and let cool all the way on the rack. Molasses Ginger Snaps Method: Start off by making your flour mixture. In a bowl, combine all-purpose flour, ginger powder, cinnamon, nutmeg, cloves and sea salt. Whisk together. In a separate bowl, whisk together your melted unsalted butter, brown sugar and blackstrap molasses until fully combined. Then, add in 1 egg yolk. Fold in your flour mixture with the liquid ingredients until all of it is combined. Once you have your dough, roll into 2-inch diameter balls and then roll in granulated sugar. Place on a baking sheet lined with parchment paper and bake them at 350 degrees Fahrenheit for 10-15 minutes or until they're fully cooked.
- Hollandaise
Anyone can make Hollandaise so long as you have a bowl, a pot, and a whisk. I would say that's pretty minimal equipment. I think hollandaise is one of those sauces that most people never even think to make at home, and therefore never get the chance to discover how easy it is. INGREDIENTS: 4 egg yolks 3/4 cup plus 1 tablespoon (182g) cold unsalted butter, cut into cubes 1/2 tsp (2g) granulated sugar 1/2 Tbsp (7g) lemon juice plus more for finishing 1 tsp (4g) water Salt to taste INSTRUCTIONS: Method: Bring a small pot filled with an inch of water to a light simmer. Separate 4 egg yolks and place ach yolk into a medium-sized bowl that can fit into the simmering pot of water without touching the bottom. Place your bowl on top of the simmering pot and add to you bowl your water, sugar, salt and lemon juice. Whisk together for 30 seconds, then take off of the heat. Continue whisking until it becomes lighter in color. Then, place it back on the heat and continue to whisk until the eggs thicken just a bit. While continuously whisking, add in unsalted cold butter cut into cubes. Add it in bit by bit, allowing them to melt into the mixture. Continue this process until it’s fully emulsified. (If your sauce isn’t thick enough, whisk it over the heat for another 30 seconds). Once done, pour sauce directly into a thermos - something to keep it hot. Make sure to serve within one hour.
- Homemade Mashed Potatoes
During Thanksgiving it's one of the most important and beloved side dishes of all time. The soaker of juices, the holster of roasted meats. A simple way to make the perfect mashed potato. INGREDIENTS: 3 pounds Yukon Gold Potatoes Flavor Liquid Ingredients: 1/2 cup plus 2 Tbsp (130g) Unsalted butter 1/3 cup (78ml) heavy cream 1 cup (300ml) whole milk 4 cloves garlic, crushed lightly left in pods Aromatic Ideas: Bay leaf Thyme Oregano Chile Flakes Sage Chives Parsley Green Onion INSTRUCTIONS: Method: Take your yukon gold potatoes and peel them over a piece of parchment paper. Cut them into 1x1 inch pieces and place them into a cold pot of water. Season the water heavily with salt and bring to a rapid boil over high heat. Boil the potatoes for 15-20 minutes or until fork tender. Once the potatoes are done cooking, strain through a colander and allow them to drain of their water. Using a potato ricer, and while your potatoes are still hot; press all of them through on the finest setting into a separate bowl. Place to the side and keep warm. To make the flavor liquid, melt unsalted butter in a pot set to medium-low heat. Once the butter is half-way melted, add in 4 cloves of lightly crushed skin-on garlic. From there, add in whole milk and heavy cream. Season with salt and whisk together *Add in chosen amount of aromatics* Bring up to a steamy heat and let steep for 10 minutes. Strain out any aromatics you added and pour into the bowl with the pressed potatoes. Stir until everything is evenly incorporated, season with salt and pepper to you liking and serve.
- Kimchi
Let's simplify this together, and stick to a basic recipe. At the end of the day, it's spicy fermented cabbage, and it's really really good. Never waste your money on kimchi at the store ever again. SUPPLIES: Less Spicy Red Pepper Flakes Spicier Red Pepper Flakes Fish Sauce INGREDIENTS: Vegetable Ingredients: kosher salt for curing 1 large napa cabbage (2 lbs 2 oz OR 980g) 2 medium sized carrots 1 small daikon radish 1 bunch green onion Paste Ingredients: 1 large asian pear (250g) 6 cloves (20g) garlic, peeled 2 inch (82g) piece ginger, peeled 1/4 cup (60ml) fish sauce 1/3 cup (65g) korean red pepper flakes *be careful with these, if yours are very spicy then reduce the amount to 1/4 cup (52g)* INSTRUCTIONS: Method: Take your napa cabbage and slice in half lengthwise. Cut each of those halves and cut in half again, making quarters. Cut each of those quarters into 1-inch wide strips. Take your cabbage and place into a large bowl, heavily seasoning it with kosher salt. Squeeze and toss your cabbage really hard, bruising it. Let it sit for at least 30 minutes. While the cabbage is sitting, take your green onions and cut the root bottoms off. Cut the onion into ½-inch segments. Take your carrots and roughly chop them julienne style. Next, peel your medium-sized daikon and cut them like your carrots, but a thicker julienne chop. To make your paste, slice your 2-inch segment of peeled ginger and place into a food processor. Peel and chop an asian pear into cubes and add to the processor. Add in 6 cloves of peeled garlic, and a ¼ cup of fish sauce. Blend until smooth. Transfer paste to a medium-sized bowl and mix together with korean red pepper flakes. After your cabbage has been sitting, drain through a colander and rinse with water while squeezing at the same time. Toss and squeeze until you’ve washed off the majority of the salt. Add your cabbage and all of the vegetables you cut into a large bowl. From there, add in all of your paste and toss to thoroughly coat. Once evenly coated, pack contents into a ½ gallon glass jar that is large enough to fit the mixture. Using a spoon or muddler, press down all of the vegetables so it is packed together, removing any air bubbles in there. Loosely cap the jar off, making sure you don’t tighten it all the way down (for it to release gas) and let it sit for 4-7 days. Make sure to press it throughout this time to remove air bubbles that form throughout. Once your kimchi has reached the desired flavor point, tighten the cap all the way and store it in the refrigerator.
- Croissants
This Croissant recipe is about as minimal equipment as you can get in a recipe. All it requires is some focus, and a little bit of patience. Oh, and a rolling pin helps too. Then you end up with beautifully flakey and buttery croissants that have a glossy crispy exterior, and a soft and rich inside. ITEMS USED: Kitchen Scale OXO Good Grip Stainless Steel Scale INGREDIENTS: 130g water @ 100 degrees Fahrenheit 6g active dry yeast 250g bread flour 30g granulated sugar 5g fine sea salt 25g unsalted butter, melted 1 egg yolk (about 18g) Beurrage (butter block): 138g unsalted butter (ideally high butter fat European style butter like plugra, wuthrich, etc.) Sample Schedule: Day 1: (the night before around 8 or 9 p.m.): Make your dough and prepare it for it's overnight rest. Day 2: 9am-Make beurrage 9:25am - Encase butter in dough, roll and fold 10:30am - Second fold 11:30am - Roll dough out to correct size for slicing and shaping. Rest in the fridge. 12:30am - Cut dough and shape croissants. Brush with egg wash and proof. 2:30P.M - Brush again with Egg wash 2:35 P.M - Bake INSTRUCTIONS: Method: First, bloom your yeast by whisking in active dry yeast into water warmed to around 100 degrees Fahrenheit. Let sit for 10 minutes or until it starts to get foamy on the top. In a medium sized mixing bowl, add bread flour, granulated sugar and fine sea salt. Give a thorough whisk until everything is incorporated. Add in your bloomed yeast mixture, 1 egg yolk and unsalted melted butter. Mix with a spatula until it begins to form a dough, then use your hands and lightly knead to have it fully come together. Once the dough comes together, to give the dough a little strength; pick up the dough and slap it against the table and fold it over itself. Continue this process for 30 seconds to 1 minute. You’ll know this process is done when you start to see a smooth surface on the dough. Once done, gently shape it into a ball and place back into your medium-sized bowl. Cover with plastic wrap and let it rest in the fridge for 10 minutes. Once rested, perform “it’s first turn.” Grab an edge of the dough, gently pull and stretch it, folding it over itself and gently patting it down with the palm of your hand. Repeat this process all the way around the perimeter of the dough, until you’ve stretched all the sides. Flip the dough over and place it seam side down, covering in plastic wrap and resting it in the fridge for 10 more minutes. After 10 minutes, repeat the process of “turning” for a total of two turns; being careful not to tear the dough when stretching it. Wrap the dough in plastic wrap one last time and let it rest in the fridge for 25 minutes. Once rested, place the finished dough on a sheet of wax paper. Roll the dough into a 7-inch by 7-inch square using a ruler. Once it is an oval shape, take your wax paper and fold it so that the edges of the wax paper measure to be 7x7 inches. Flip the dough over and roll it into those edges, conforming to the shape of the wax paper. Make sure your dough is evenly flat. Do not press too hard, otherwise the dough will burst through the wax paper. Once shaped, place in the fridge overnight for 12 hours. *Look at sample schedule above*. For day 2, lay out your evenly sliced pieces of unsalted European butter on wax paper, until they’re roughly 4x4 inches. Leave about ½-inch of space around the edges for pounding later on. Fold your wax paper over the butter so that the edges of the wax paper measure to be 4x4 inches. Flip over so the seam side is done and using a rolling pin, pound out the butter so it spreads out to the edges evenly. Place in the fridge to chill for 15-25 minutes. Lightly flour a work surface and pull your dough out of the fridge. With your rolling pin, flatten out and elongate all of the edges of your dough. Place your butter in the center of your dough diagonally. Take each edge of the dough and stretch it over the butter, encasing it. Once it is totally encased and no butter is showing, pinch and close the edges shut. Flip over seam side down. Lightly flour your rolling pin and the top of your dough. Using your rolling pin, press down multiple times along the entire length of the dough, helping encase the butter. Next, roll with an even pressure and form the dough into a long rectangle, roughly 18-inches in length. Once rolled, grab the bottom of your dough - the part closest to you - and fold it ¾ of the way up the rectangle. Take the top half and fold it the remaining ¼ of the way until both ends meet evenly. Lightly pat down so they stick. Then fold the longer portion over the short portion, making an envelope shape. Using your rolling pin, lightly tap down so that all of the layers are stuck together. DO NOT PRESS. Wrap in plastic wrap and let rest in the fridge for one hour. Once rested, unwrap your dough and place it on a lightly floured work surface. Using your rolling pin, roll the dough in the same direction; shaping it into a wider rectangle.As before, give the dough a tap along the entire surface and roll it out with even pressure until it reaches about 18-inches in length. Grab the top portion of your dough and fold it ⅓ of the way down, then fold the bottom part so that it overlaps evenly on the other side. Wrap in plastic wrap and place in the fridge for 1-12 hours as needed. For the final roll, roll your dough into a wider and thicker rectangle. (about 10x10 inches.) To shape the croissants, make marks along the bottom of the dough at 1 ½ inch intervals. Repeat by following in between the two marks at the top as well. To cut the croissant, take a long sharp knife and make cuts following along the points you made earlier. These cuts should make 5-6 croissant triangles. Take a triangle of dough and gently elongate it to make it about an inch longer. Next, roll the dough up very tightly, starting from the longer end up to the point of the triangle. Make sure to not squeeze the layers. Repeat this process with every croissant. Place croissants tail side down on a baking sheet lined with parchment paper. Brush the tops with egg wash (one whole egg whisked together). Cover with a rimmed baking sheet inverted and let proof at 78 degrees Fahrenheit for 2 hours. You can proof these in the lowest rack of your oven with the light turned on, leaving the door open slightly. Once proofed, give another egg wash brushing and bake at 390 degrees Fahrenheit for 6 minutes. Then, bake again at 330 degrees Fahrenheit for 10-15 minutes or until they’re golden brown and puffy.